Dark Mode
Dark mode support is now available for the StableBit Cloud and our StableBit apps! To get dark mode support, simply update your StableBit apps to their latest versions, and you should be all set. If you’re running an operating system…
Software³ + Blog
Software³ + Blog
Dark mode support is now available for the StableBit Cloud and our StableBit apps! To get dark mode support, simply update your StableBit apps to their latest versions, and you should be all set. If you’re running an operating system…

The StableBit Cloud is now available as a release final along with all of our StableBit Apps. With this release we are also introducing the StableBit Cloud+ subscription option. To get started with everything, visit: In this blog post we’re…

The final phase of the StableBit Cloud BETA is here and it’s time for another update. If you don’t know what the StableBit Cloud is, check out my previous post which describes the service in detail. Or better yet, to…
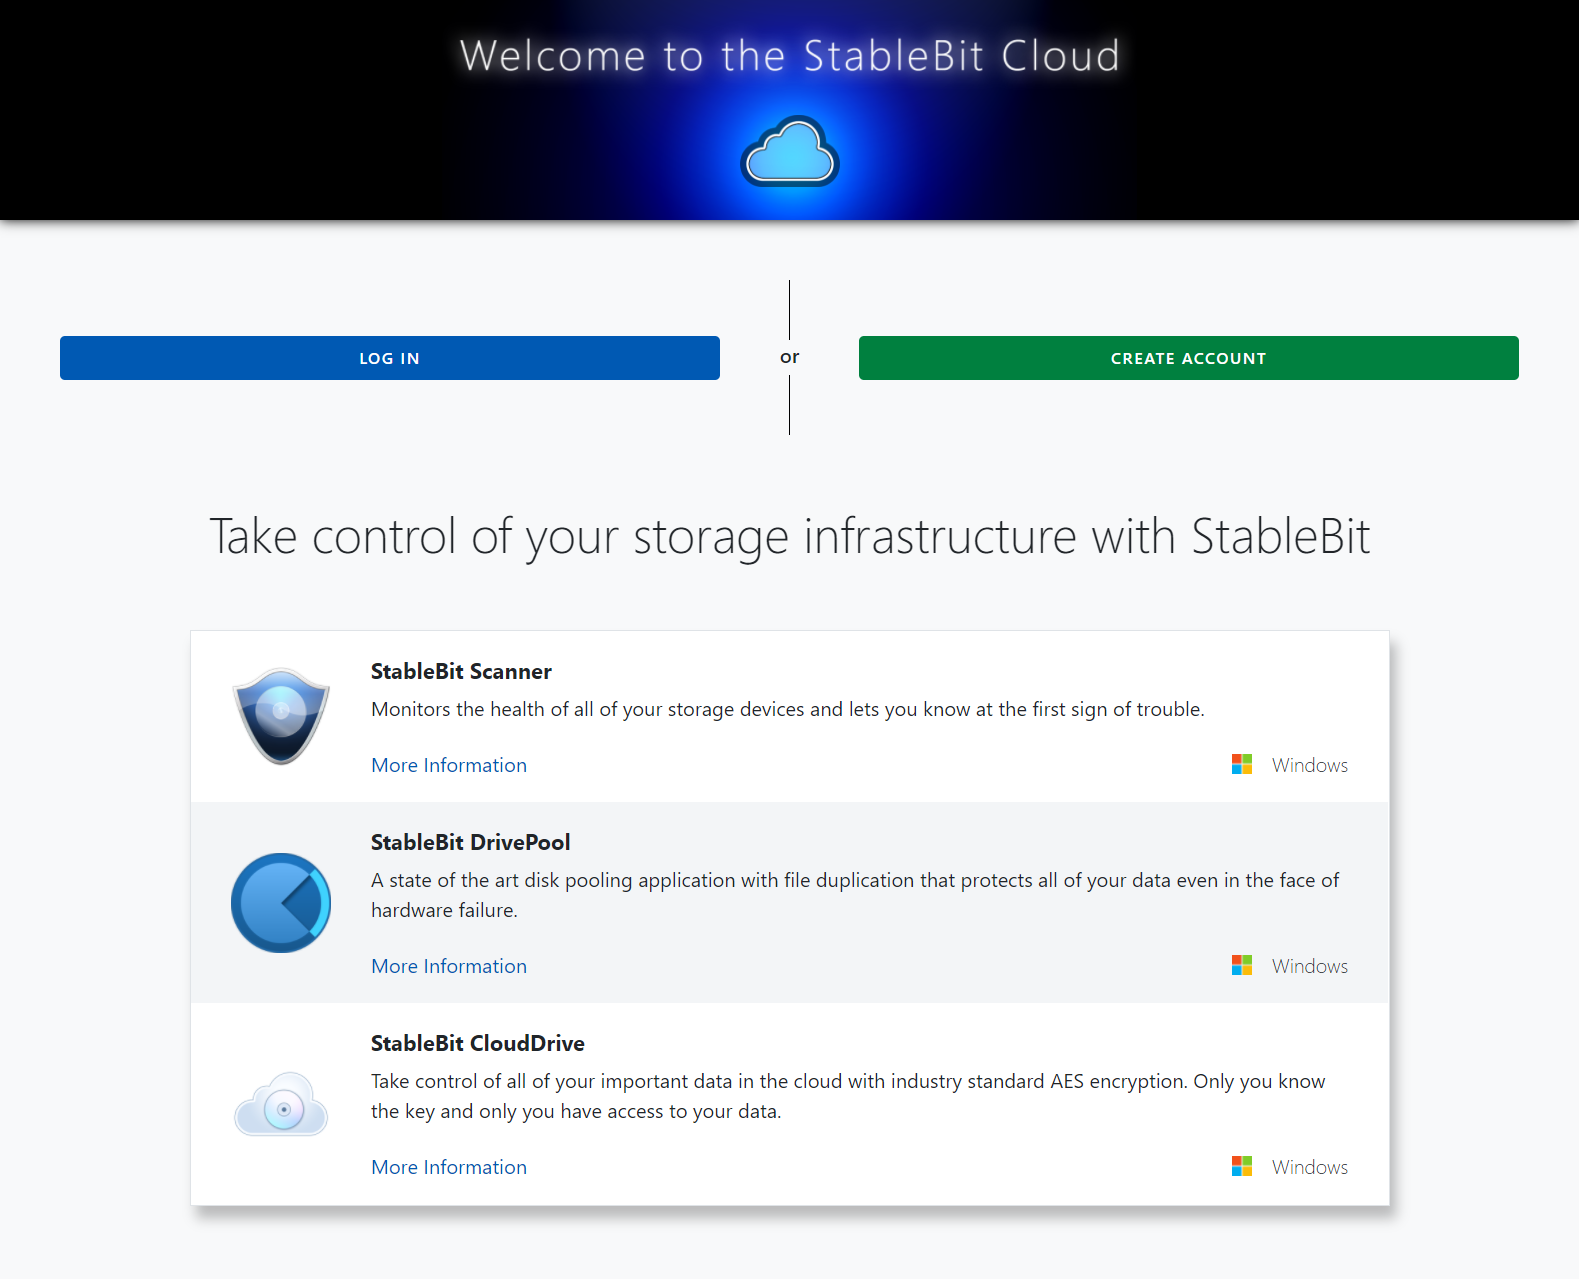
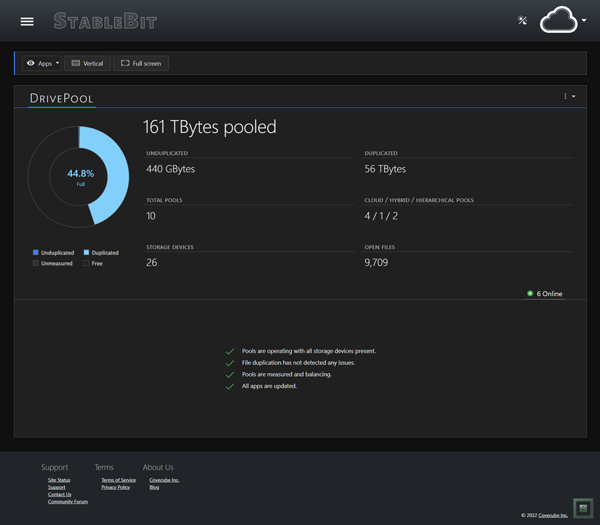
The StableBit Cloud is a brand new online service developed by Covecube Inc. that enhances our existing StableBit products with cloud-enabled features and centralized management capabilities. The StableBit Cloud also serves as a foundational technology platform for the future development…
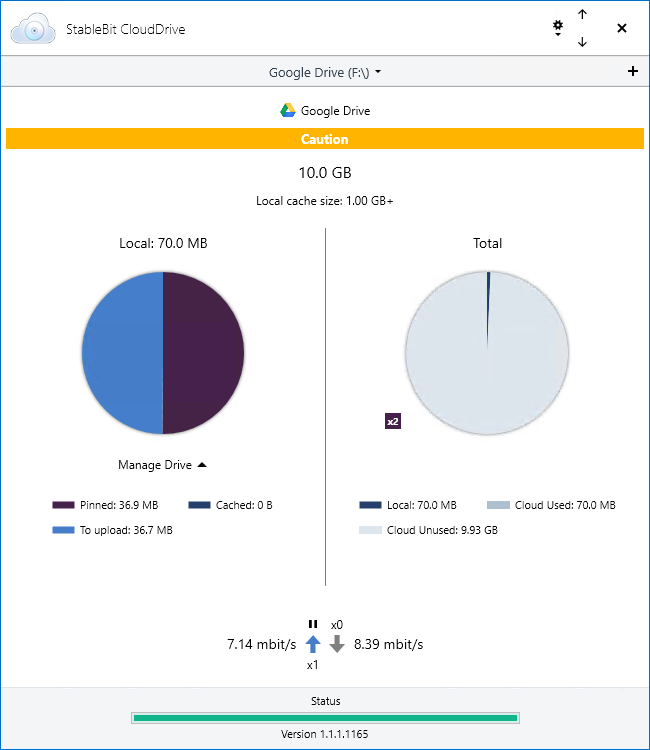
StableBit CloudDrive 1.1.1.1165 Release Final is now available for download. Get it here: Full change log: What’s new since the last Release Final (1.1.0): Tested and signed for Windows Server 2019. Optional cloud data duplication. Full drive data duplication. Pinned…
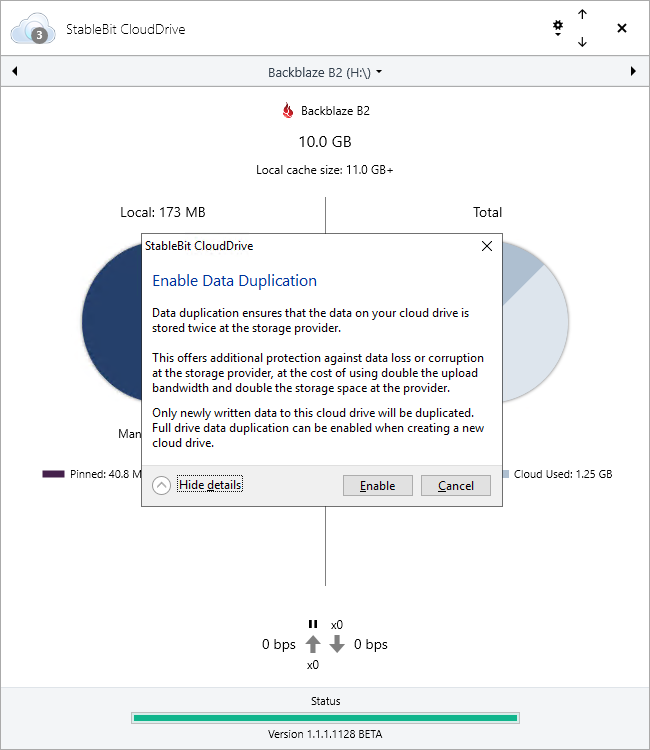
StableBit CloudDrive 1.1.1.1128 BETA is now available for download. Get it here: Full change log: What’s New Since the last Release Final (1.1.0): Tested and signed for Windows Server 2019. Optional data duplication. Bug fixes and optimizations. Data…
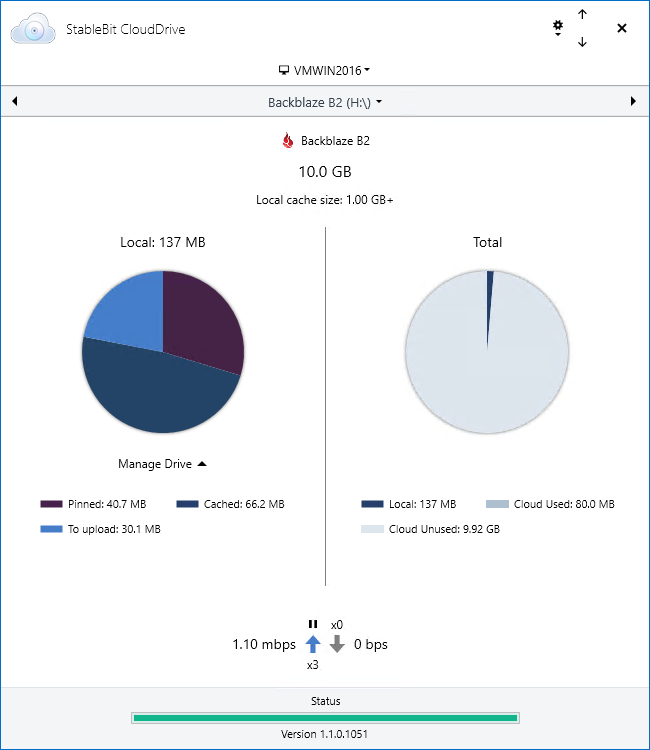
StableBit CloudDrive 1.1.0.1051 Release Final is now available for download. Get it here: Full change log: What’s New Since the last Release Final (1.0.2): Added support for Backblaze B2. Added support for Rackspace Cloud Files. Added support for…
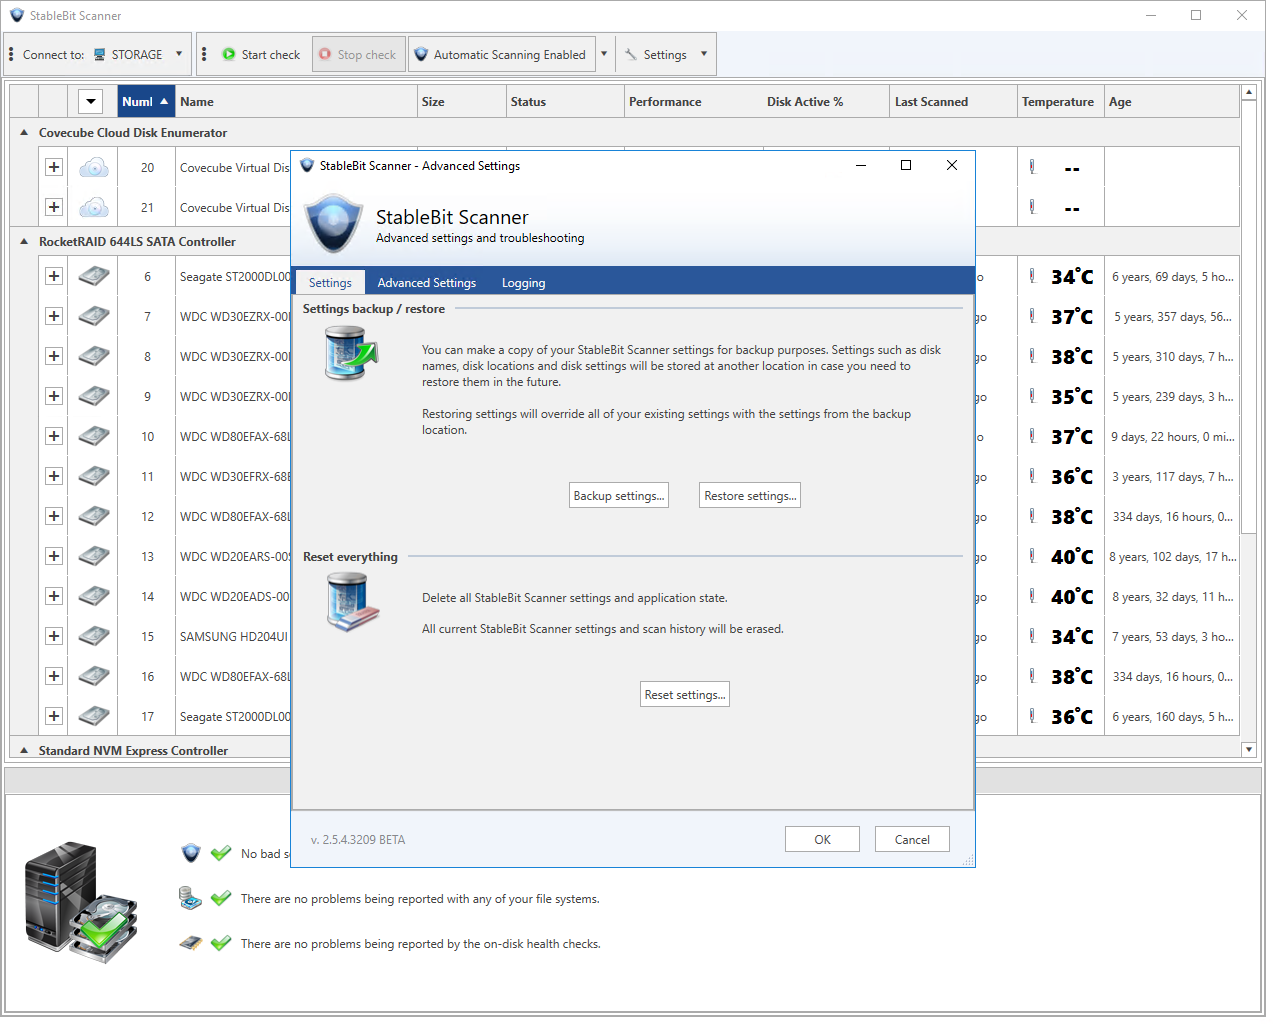
A new BETA of the StableBit Scanner is now available for download. Download it here: Full change log: This is mostly a bug fix release with some minor enhancements. Settings Backup and Restore Under advanced settings and troubleshooting you now…
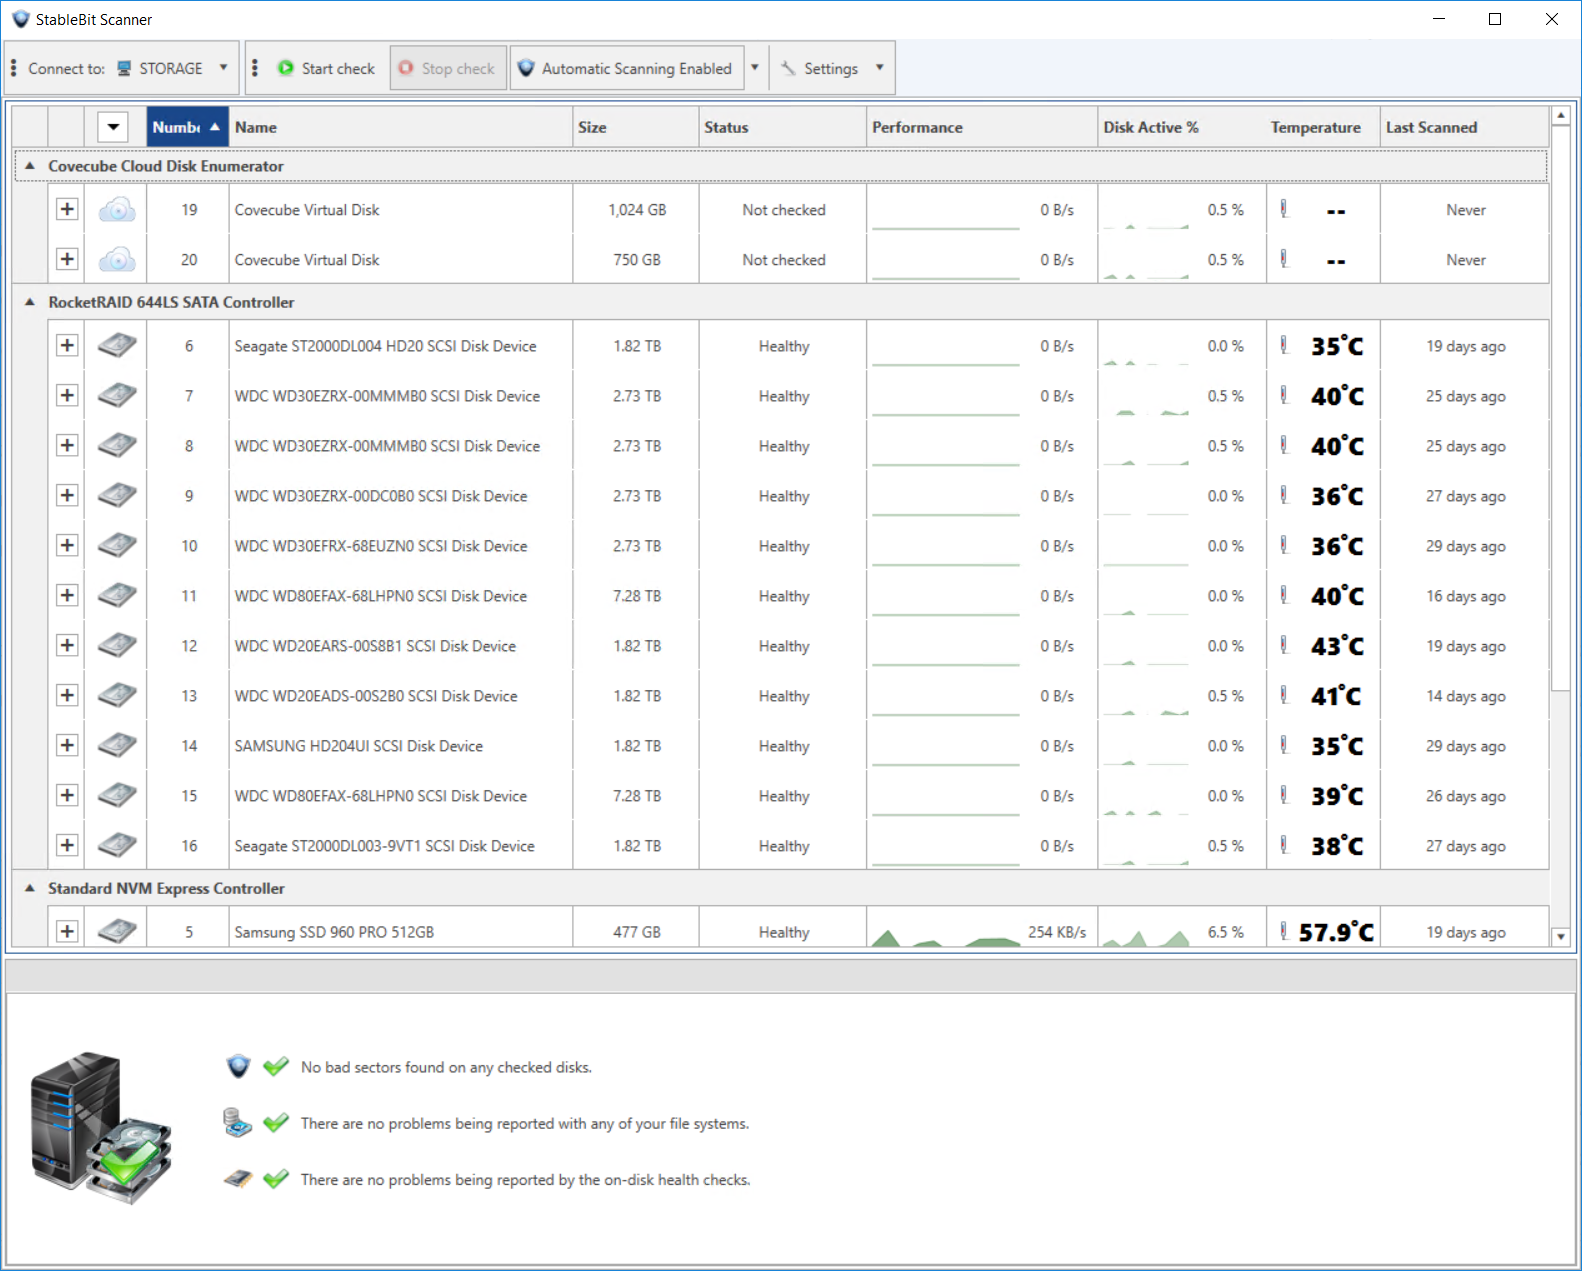
StableBit Scanner 2.5.2.3190 Release Final is now available for download. Get it here: Full change log: What’s New Since the 2.5.1 Release Final: Full support for the NVMe 1.3 specification. Updated support for ACS-4 and SATA 3.4. Additional new themes.…

The latest StableBit CloudDrive BETA features 3 new storage providers, adds support for third party Amazon S3 services, and as always has a number of bug fixes and improvements. Download it here: Full change log: New Storage Providers Amazon S3…